Regular and extraordinary fees, SEPA direct debits, banking, arrears and reports.
1.1 Annual report and AI financial analysis
Updated on
15/09/2026
Produce the year-end accounts as PDF or PowerPoint and get an automatic analysis.
The annual report brings together all the accounts for the financial year: what was budgeted, what was spent, what came in and the final result. It is the document presented to residents at the ordinary meeting to approve the accounts.
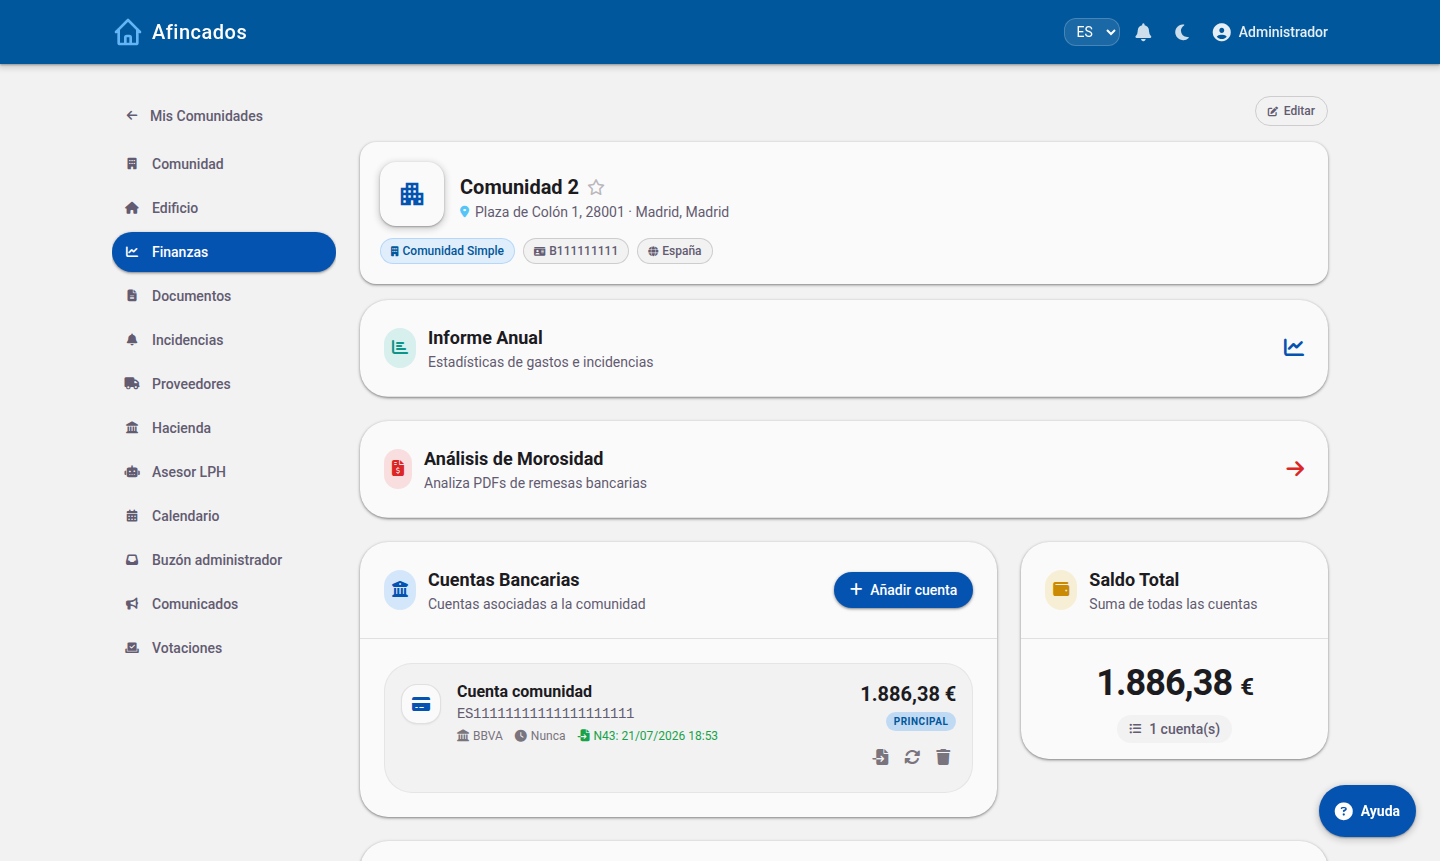
The «Annual report» block gathers the year's expense and incident statistics.
Producing the report
Open the community and go to the Finances tab.
Click Annual report.
Select the financial year you want to analyse.
The screen shows the summary: expenses by category, income from fees, a comparison against the budget and the closing balance. You can break it down by division (to see what each block spent) or by owner (to see what each one contributed).
Exporting
PDF: the formal accounts document, ready to attach to the meeting notice.
PowerPoint: a slide deck with the headline figures and charts, meant to be projected during the meeting.
Excel: the raw data, in case you need to work with it.
Artificial intelligence analysis
The AI analysis option reviews the year's accounts and writes a plain-language report highlighting:
The variances against the budget and which categories they came from.
Unusual expenses or ones that have shot up compared with previous years.
How arrears have evolved and their impact on cash flow.
Recommendations for next year's budget.
It is a good starting point for preparing what you will say at the meeting, though you should review its conclusions before presenting them: the AI analyses the data held in the application, so anything you have not recorded will not be taken into account.
Custom questions
With Custom query you can ask about the community accounts in plain language ("how much have we spent on plumbing over the last three years?") and download the answer as a PDF.
Who can access it
The report is available to the property manager and to board members. If you want every resident to see it, export it to PDF and upload it to the community Documents tab.
1.2 Bank accounts, transactions and Norma 43
Updated on
15/09/2026
Add the community account, sync it with the bank and import statements.
Linking the community bank account means transactions flow into the application on their own and resident payments are reconciled against their fees automatically.
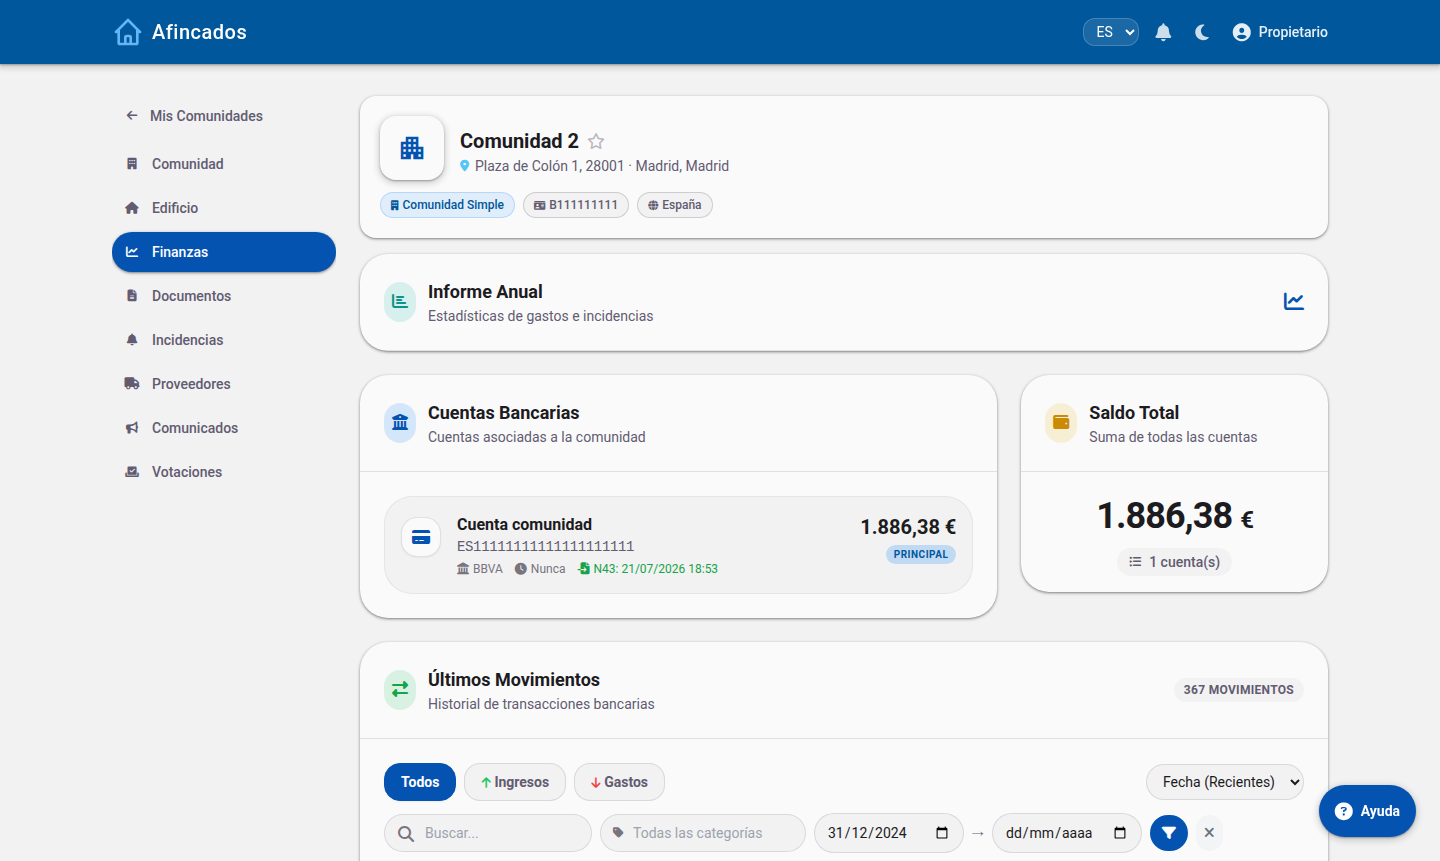
Each account shows its balance, bank and the date of the last N43 file imported.
Adding an account
Open the community and go to the Accounts tab.
Click New account.
Enter the IBAN and give it a name that identifies it (for example, "Main account" or "Reserve fund").
Select the bank from the list.
Save.
A community can have several accounts; they all appear on the tab with their current balance.
Connecting to the bank
To have transactions download on their own, click Sync on the account. You will be redirected to your bank website to authorise read-only access. Once authorised:
Transactions are downloaded automatically.
Incoming payments are matched against outstanding fees, which are then marked as paid.
The account balance stays up to date.
Banking regulations make the authorisation expire periodically; when that happens, click Sync again to renew it.
Importing a statement (Norma 43)
If your bank does not support a direct connection, you can download the statement from its website in Norma 43 format (a text file every Spanish bank offers) and import it:
On the account, click Import Norma 43.
Select the file downloaded from the bank.
Review the preview of the detected transactions.
Confirm the import.
The application skips transactions that were already recorded, so you can import overlapping statements without creating duplicates.
Manual entries
To record a transaction the bank does not have (a cash payment, an accounting adjustment), click New entry on the account and enter the date, description and amount. If an entry is wrong, you can delete it from the transaction list.
Deleting an account
The Delete account option removes the account and its transaction history from the community. It cannot be undone, so only use it for accounts created by mistake or already closed at the bank.
1.3 Calculating, editing and deleting regular fees
Updated on
15/09/2026
Split the annual budget across the properties and publish each resident fee.
The regular fee is what each owner pays periodically to cover the running costs of the community. The application works it out for you: you enter the budget and it splits it across the properties according to their ownership share and the expense categories assigned to them.
Fees are calculated and reviewed from the Finances tab.
Before you start
Every property must have its ownership share, and they must add up to 100.
The expense categories must be created and assigned to the relevant properties.
You need the budget approved at a meeting.
Creating the fees
Open the community and go to the Fees tab.
Click Calculate fees.
Select the financial year and the frequency: monthly, quarterly or annual.
Enter the budgeted amount for each expense category (cleaning, lift, insurance and so on).
Click Calculate. You will see a preview of what each property would pay, with nothing saved yet.
Review the table. If the split looks right, click Save to publish the fees.
As soon as you save, every resident sees their fee on their record and receives a notification.
Editing the fees
You can change the amounts while the financial year is still open:
Recalculate: go back to Calculate fees, change the budget and save. The fees for that year are replaced by the new ones.
Adjustment: the Fee adjustment option applies a percentage increase or decrease to every fee at once, without touching the budget. This is what you use when the meeting approves, say, a 5% rise. Before applying it you can generate a simulation PDF to present at the meeting.
Individual fee: from a property record you can adjust that particular fee without affecting the others.
Deleting a fee
If you got the calculation wrong, open the fee and click Delete. This removes the fees of every property for that period, so only do it if they have not been charged yet. If you have already generated a bank direct debit file, cancel that first.
Reviewing and exporting
History: shows the fees of previous financial years, useful for comparing how they have evolved.
Export to PDF or Excel: produces the fee table so you can attach it to the minutes or send it to residents.
Import CSV: if you keep the fees in a spreadsheet, you can upload them instead of calculating them.
1.4 Checking your fees and setting up direct debit
Updated on
15/09/2026
See what you pay, review your history and add or change your bank account.
As an owner you can check at any time what you pay the community, whether you have any outstanding receipts and which bank account is charged. Only you and the property manager can see your financial details: no other resident has access to them.
As a resident you can check balances and transactions, without management actions.
Viewing your fees
Open your community.
Go to the Fees tab.
You will see your current fee, how often it is charged (monthly, quarterly or annually) and the breakdown by item: how much of your fee goes to cleaning, how much to the lift, how much to insurance. Any extraordinary levies that apply to you also appear here, if the community has approved one.
Each receipt shows whether it is paid or outstanding. The history lets you look up what you paid in previous financial years.
Adding your bank account
For the community to charge you by direct debit it needs your IBAN.
On the Fees tab, click My bank account.
Enter the IBAN of the account you want the receipts charged to.
Save.
The property manager is notified and will validate the account. From the next direct debit run onwards, receipts will be charged there.
Changing or removing the account
You can change your IBAN whenever you like from the same screen: overwrite the previous one and save. Do it well before the charge date, because a run already sent to the bank cannot be redirected to another account.
If you would rather stop paying by direct debit, clear the IBAN and let the property manager know so you can agree another payment method.
If a receipt was returned
It will show as outstanding again. Check that your IBAN is right and that the account had funds, correct it if needed, and contact the property manager through the Messages tab to agree how to settle it.
If you disagree with your fee
The fee is calculated automatically from your property's ownership share and the budget approved at the meeting. If you think there is a mistake, write to the property manager from Messages explaining which item does not add up: they can review the ownership share and the expense categories assigned to your unit.
1.5 Creating and managing extraordinary levies
Updated on
15/09/2026
Split a one-off cost, such as building works, across the owners and track its collection.
An extraordinary levy pays for a one-off cost that was not in the budget: renovating the façade, replacing the lift, fixing a major fault. It is split across the properties just like the regular fees, but it is separate from them and charged on its own.
Special levies are created from Finances, next to the ordinary fees.
Creating a levy
Open the community and go to the Fees tab.
Click New extraordinary fee.
Give it a clear description: it is what the resident sees and what appears on the receipt (for example, "Façade levy 2026").
Enter the total amount to be shared out.
Choose how it is split:
By ownership share: each property pays according to its share. This is the usual choice.
Equally: every property pays the same.
Only one group: for example, only the flats in one block or those that use the lift.
State whether it is charged in one go or in instalments, with its start date.
Review the preview of the split and click Save.
The owners affected receive a notification and see the levy alongside their fees.
Editing a levy
Open the levy and click Edit. You can change the description, the amount, the split or the number of instalments. If you change the amount, the application recalculates what each property owes.
Take care if some instalments have already been charged: only change the outstanding ones so what has been paid still adds up.
Individual additional fees
If you need to charge something to a single owner (a repair they are liable for, a private consumption), do not create a levy: use Additional fee from their record. You can also apply it to several owners at once with the bulk additional fee option.
Deleting a levy
From the fee list, open the levy and click Delete. It is removed for every property and cannot be recovered. Only do this if it was created by mistake and has not been charged yet.
Documenting and collecting
Levy PDF: produces a document with the split property by property, ideal to attach to the minutes that approve it.
Direct debit: once created, you can generate a bank file to collect it by direct debit, just like the regular fees.
1.6 Generating SEPA direct debits and recording payments
Updated on
15/09/2026
Collect the fees by direct debit and track who has paid and who has not.
A direct debit run is the file you send to the bank to collect the fees of every owner on direct debit in one go. The application generates it in the SEPA format banks accept.
The SEPA file is generated against the community's main account.
Before you generate it
The community must have its tax number and its SEPA creditor identifier, which your bank provides.
Every owner paying by direct debit must have their IBAN on record.
The fees for the period must be calculated and saved.
Generating the file
Open the community and go to the Fees tab.
Find the fee or levy you want to collect and click Generate direct debit.
Enter the charge date: the day the bank will take the payments.
Review the list of payments included. The application leaves out anyone without an IBAN and warns you about it.
Click Download. You get an XML file.
Upload that file to the community online banking.
The Direct debit report button produces a PDF with every payment and its amount, handy for your records and for reconciling with the bank.
Recording payments
The Payments tab shows, for each property, whether its fee is paid or outstanding.
Click the indicator on a fee to mark it as paid or set it back to outstanding. It is a toggle: use it both to record a payment and to undo it if you made a mistake.
If your bank account is linked, payments are reconciled automatically when transactions are synced, so you will not have to mark them by hand.
Returned payments
When the bank returns a payment, set it back to outstanding on the payments tab. That fee counts as unpaid again and the owner will start appearing in the arrears tracking, where you can manage the claim.
Analysing a run with AI
The Analyse direct debit option lets you upload the response file from the bank (or a PDF listing the returned payments) so the application can automatically work out which payments were rejected and update their status, saving you from checking them one by one.
1.7 Spanish tax forms 347, 111, 190 and 303
Updated on
15/09/2026
Prepare the community tax returns from the expenses already recorded.
The application prepares the tax forms the community has to file, using the expenses, suppliers and withholdings you have already recorded. It does not file them with the tax office for you, but it gives you the figures calculated and checked.
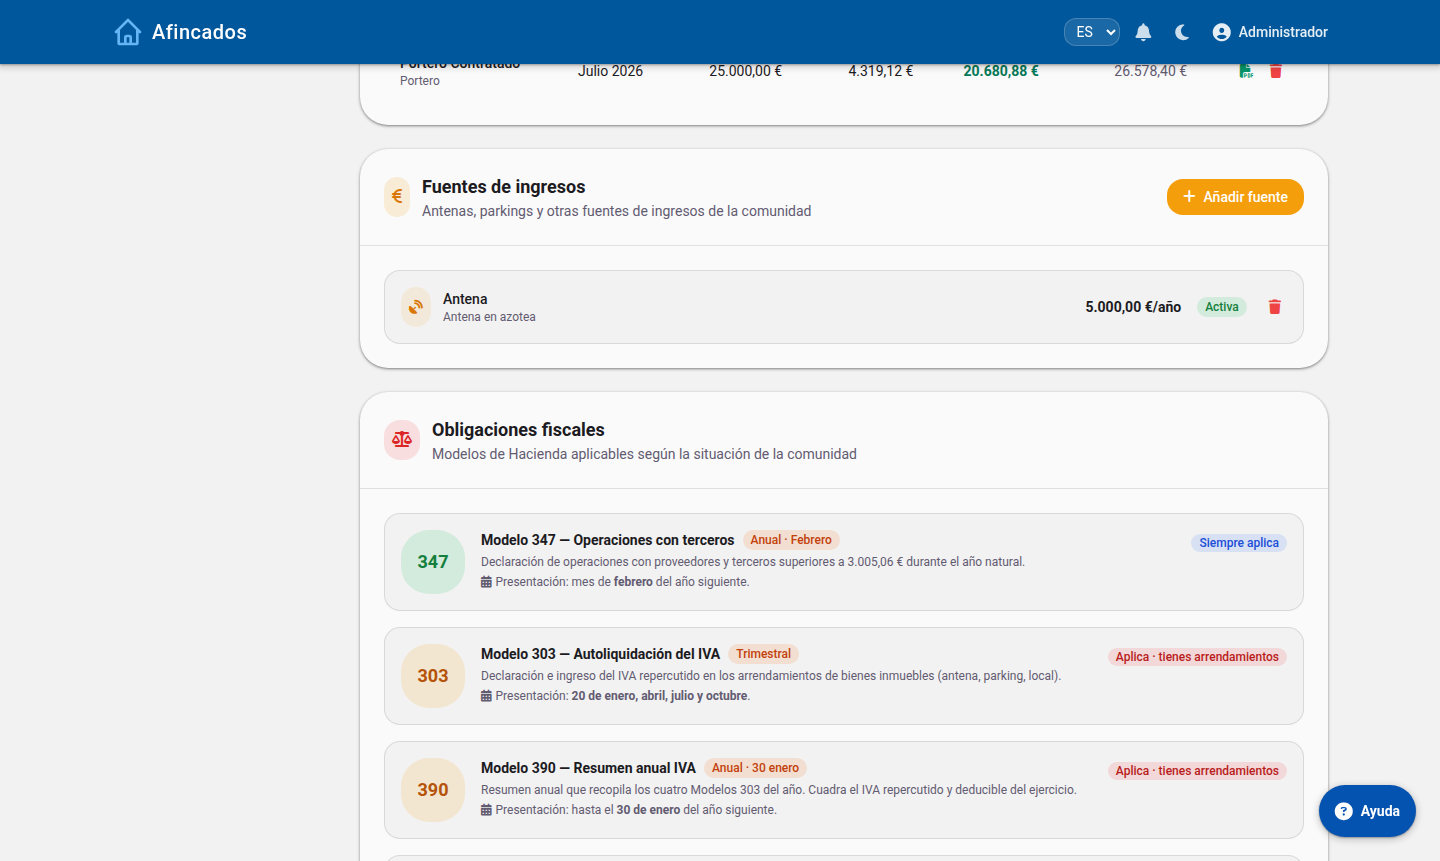
The app flags which forms apply given the community's situation.
Before you start
The community must have its tax number filled in.
The expenses for the year must be recorded, with their supplier and amount.
Suppliers must have their tax number, otherwise they cannot be included in the information returns.
The available forms
Form 347: annual declaration of transactions with third parties. It covers suppliers the community paid more than €3,005.06 over the year.
Form 111: withholdings and payments on account made (for example, to the caretaker or to professionals), filed quarterly.
Form 190: the annual summary of those same withholdings.
Form 303: VAT self-assessment, for communities carrying out taxable activities.
Producing a form
Open the community and go to the Finances tab.
Click Tax forms and pick the one you need.
Select the financial year and, if the form is quarterly, the quarter.
The application works out the amounts and shows the breakdown by supplier.
Check the figures and download the result to transfer it into the tax office form.
Check before you file
The calculation is only as good as the data recorded. Before treating a form as final, check that:
Every expense in the period has been entered, including those paid in cash.
No supplier is duplicated across two separate records, because their amounts would then be split and might fall below the form 347 threshold.
The supplier tax numbers are correct.
If you spot a mistake, fix the expense or the supplier record and produce the form again: it is recalculated with the updated data.
1.8 Tracking arrears
Updated on
15/09/2026
See who owes fees, log your collection efforts and prepare the claim.
The arrears section brings together the owners with outstanding fees and lets you record every collection effort, which is essential if the community ends up claiming the debt through the courts.
The «Arrears analysis» block reads the PDFs of your bank direct debits.
Who can see it
The property manager and the board members. Residents do not see other owners' debts: each one only sees their own.
Reviewing the debtors
Open the community and go to the Finances tab.
Click Arrears.
You get a list with each owner in debt, the total outstanding amount, the number of unpaid receipts and how old the oldest debt is. You can sort by amount to tackle the worst cases first.
Clicking an owner opens the detail: exactly which fees they owe and since when.
Logging a collection effort
Every time you contact a debtor, write it down. This is how you show the community tried to collect before making a claim.
Open the debtor's detail.
Click Add note.
Write down what you did: a phone call, a recorded delivery letter, an agreement to pay in instalments, and so on.
Save. The note is stamped with the date and your user.
Notes can be edited if you made a typo and deleted if they were created by mistake, but it is best not to erase the history of genuine collection efforts.
Cross-checking against documents
The Analyse option lets you upload a PDF (for example, a list of returned payments from the bank) so the application reads it and automatically matches the unpaid items to the owners, updating the status of their fees without you having to go through them one by one.
When the resident pays
Mark their fees as paid on the Payments tab. The owner drops off the debtor list automatically as soon as their debt reaches zero. If they had an instalment agreement, add a note recording that it was fulfilled.